


Deep fryers are workhorses in both commercial kitchens and home cooking spaces. They deliver perfectly crispy foods that people love, from golden french fries to crunchy chicken wings. However, keeping these appliances clean and functioning properly requires regular attention and the right techniques.
Many people avoid deep fryer cleaning because it seems messy and complicated. The truth is that with proper methods and oil filtration, the process becomes much simpler. Regular cleaning not only extends the life of your equipment but also ensures your food tastes better and stays safer to eat.
This comprehensive guide will walk you through everything you need to know about cleaning your deep fryer correctly. You’ll learn why oil filtration matters, what tools you need, and step-by-step procedures that make the job easier. Whether you own a small home unit or manage a busy commercial kitchen, these techniques will help you maintain your equipment effectively.
Understanding Why Regular Cleaning Matters
Before diving into the cleaning process, it’s important to understand why this task deserves your attention. Oil breaks down over time when exposed to high heat. This breakdown creates compounds that affect both taste and health.
Used cooking oil develops off-flavors that transfer to your food. Even if you’re making a fresh batch of fries, old degraded oil will make them taste stale or burnt. Nobody wants to eat food that doesn’t taste fresh.
Additionally, degraded oil produces smoke at lower temperatures. This smoke can set off fire alarms and create an unpleasant cooking environment. The smoke also contains compounds that aren’t healthy to breathe regularly.
Food particles that sink to the bottom of your fryer continue cooking with each use. These burnt bits create bitter flavors and contaminate your oil faster. They also increase fire risk if they accumulate too much.
Clean equipment simply works better. A fryer caked with old oil residue takes longer to heat up and uses more energy. The heating elements work harder, shortening their lifespan and potentially leading to expensive repairs.
Gathering Your Cleaning Supplies
Having the right tools makes any job easier. Before you start cleaning your deep fryer, gather everything you’ll need in one place. This preparation saves time and prevents you from stopping mid-task to search for supplies.
You’ll need a dedicated oil filtration system or at least a cone filter and clean container. Many commercial kitchens use filtration machines, but home cooks can achieve good results with simpler equipment. A large stockpot with a fine mesh strainer works for smaller fryers.
Heat-resistant gloves protect your hands from hot oil and cleaning solutions. Never skip this safety equipment. Oil can cause severe burns even after it seems cool enough to handle.
Get several microfiber cloths or non-abrasive scrubbing pads. Avoid steel wool or harsh scrubbers that can damage the fryer’s coating. A long-handled brush helps reach corners and tight spots.
You’ll also need appropriate cleaning solutions. Dish soap works for basic cleaning, but commercial degreaser is more effective for heavy buildup. Baking soda and vinegar provide natural cleaning alternatives that work surprisingly well.
Finally, have a food-safe thermometer handy. This helps you monitor oil temperature during filtration, which affects how well the process works.
Safety Precautions Before You Begin
Cleaning a deep fryer involves hot oil and electrical components. Taking proper safety measures isn’t optional. These precautions protect you from burns, electrical shocks, and fires.
Always turn off and unplug your fryer before starting any cleaning process. This simple step prevents accidental heating and potential electrical hazards. Let the oil cool to a safe handling temperature, typically around 150 degrees Fahrenheit.
Never pour water into hot oil. This creates violent splattering that can cause serious burns. Even small amounts of water in a fryer full of hot oil can be dangerous.
Work in a well-ventilated area. Cleaning solutions create fumes, and old oil has strong odors. Opening windows or turning on exhaust fans makes the environment more comfortable and safer.
Keep a fire extinguisher nearby. Although you’re working with cooled oil, having fire safety equipment accessible is smart practice whenever dealing with large quantities of cooking oil.
Wear appropriate clothing. Long sleeves and closed-toe shoes provide protection from splashes. Tie back long hair and remove jewelry that might dangle into the fryer.
The Oil Filtration Process
Oil filtration is the cornerstone of proper fryer maintenance tips. This process removes food particles and extends oil life, saving money and improving food quality. Done correctly, filtration can double or triple the usable life of your cooking oil.
Start by heating the oil to about 200 degrees Fahrenheit. This temperature allows the oil to flow easily through filters while being cool enough to handle safely. Oil that’s too cold won’t filter well because it’s too thick.
Position your filtration equipment or clean container below the fryer’s drain valve. Make sure it’s stable and can hold the entire oil volume. Slowly open the drain valve and let the oil flow into your filtration system.
If using a manual filter, pour the oil through a cone filter lined with paper or cheesecloth. This catches food particles and sediment. The process takes time, so be patient. Rushing causes spills and reduces filtration effectiveness.
For commercial filtration machines, follow the manufacturer’s instructions carefully. These systems pump oil through filters and return it to the fryer automatically. They’re more efficient but require proper setup and maintenance themselves.
Inspect the filtered oil as it collects. Good oil appears relatively clear and flows smoothly. If the oil looks very dark, smells rancid, or contains excessive foam, it’s time to replace it completely rather than just filtering.
Once filtered, you can return the oil to the clean fryer or store it properly for later use. Store oil in a sealed container away from light and heat. Proper storage prevents oxidation and maintains oil quality between uses.
Deep Cleaning the Fryer Tank
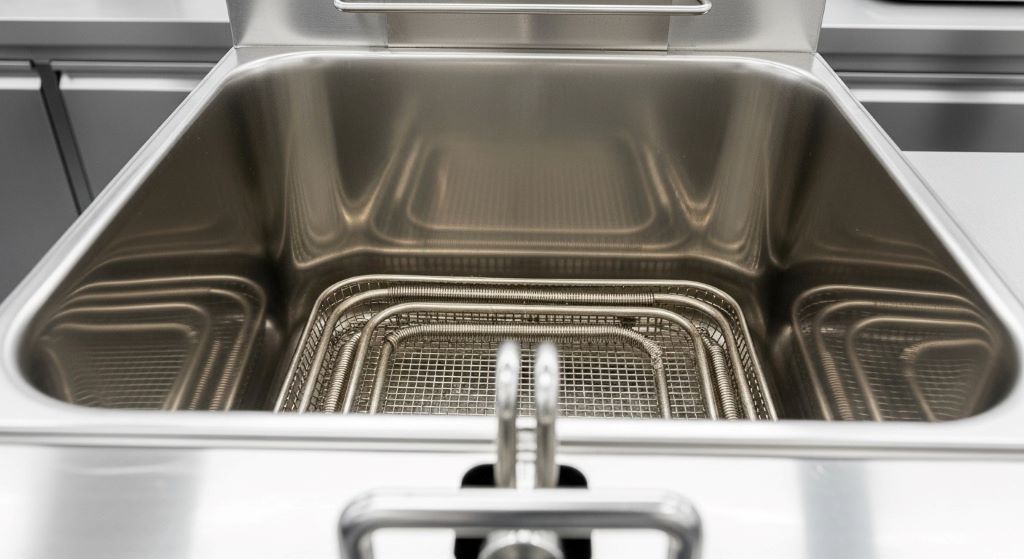
After removing and filtering the oil, you can thoroughly clean the fryer tank itself. This step removes baked-on residue and prevents contamination of your filtered oil when you return it to the fryer.
Wipe out any remaining oil with paper towels or cloth. Get as much residue as possible before adding water or cleaning solution. This makes the actual cleaning much easier and more effective.
Fill the tank about halfway with hot water and add your chosen cleaning solution. For standard cleaning, a few tablespoons of dish soap work well. For heavy buildup, use a commercial degreaser according to package directions.
Turn on the fryer and heat the cleaning solution to about 200 degrees Fahrenheit. This heat activates the cleaning solution and loosens stubborn residue. Let it sit for 15 to 20 minutes, allowing the heated solution to work.
Turn off and unplug the fryer again. Let the solution cool enough to handle safely. Use your long-handled brush to scrub the sides, bottom, and corners of the tank. Pay special attention to areas around heating elements where buildup accumulates.
Drain the cleaning solution completely. Rinse the tank thoroughly with hot water several times. Any soap residue left in the tank will contaminate your clean oil and affect food taste. This rinsing step is crucial for kitchen appliance care.
Dry the tank completely before adding oil back. Even small amounts of water can cause dangerous splattering when the oil heats up. Use clean towels to wipe down all surfaces, then let the fryer air dry for at least 30 minutes.
Cleaning External Components
The outside of your fryer needs attention too. Grease and oil splatter on exterior surfaces, creating fire hazards and attracting pests. Additionally, dirty equipment looks unprofessional in any kitchen setting.
Wipe down the exterior with a damp cloth and mild degreaser. Pay attention to control panels, handles, and the area around the drain valve. These spots collect grease from repeated handling.
Clean the fryer basket or baskets thoroughly. Soak them in hot, soapy water to loosen baked-on residue. Use a brush to scrub wire mesh areas where food particles get trapped. Rinse well and dry completely before storing.
Don’t forget the fryer lid if your unit has one. Condensation and oil vapor create buildup on the underside of lids. This buildup drips back into your oil, contaminating it. Wash lids regularly with hot soapy water.
Inspect and clean the heating elements carefully. Follow manufacturer guidelines for this step, as some elements can’t get wet. Typically, you can wipe them gently with a damp cloth once cool.
Check the drain valve and ensure it’s not clogged with debris. A clogged valve makes oil filtration difficult and can cause leaks. Clean the valve area with a small brush and make sure it opens and closes smoothly.
Creating a Maintenance Schedule
Consistent maintenance prevents major problems. Creating and following a regular schedule keeps your fryer in top condition without overwhelming you with a massive cleaning project.
Filter your oil daily if you use your fryer frequently. Commercial kitchens should filter at least once per day, sometimes more depending on volume. Home users can filter after every few uses or whenever the oil looks dirty.
Perform a deep cleaning weekly for commercial use or monthly for home use. This involves completely draining, filtering, and scrubbing the tank as described earlier. Regular deep cleaning prevents stubborn buildup that becomes harder to remove over time.
Replace oil completely based on usage and quality. Test oil regularly for breakdown signs like dark color, thick consistency, or rancid smell. Even with perfect filtration, oil eventually needs replacement. Commercial operations might change oil weekly, while home users might go several weeks between changes.
Monthly tasks should include inspecting all components for wear or damage. Check electrical cords, heating elements, and safety features. Replace worn parts promptly to prevent breakdowns during busy periods.
Keep a log of your maintenance activities. Note when you filter, deep clean, and change oil. This record helps you spot patterns and optimize your schedule. It’s also valuable for troubleshooting problems.
Extending Your Oil Life
Proper filtration and cleaning are part of the equation, but other practices also extend oil life. These habits save money and reduce waste while maintaining food quality.
Use your fryer at the correct temperature for each food type. Overheating oil accelerates breakdown. Most foods fry perfectly between 325 and 375 degrees Fahrenheit. Going higher than necessary wastes energy and damages oil.
Shake excess moisture off foods before frying. Water causes oil to break down faster and creates dangerous splattering. Pat frozen foods with paper towels and let battered items drip excess coating before lowering them into oil.
Avoid overcrowding the fryer basket. Too much food drops oil temperature drastically, causing foods to absorb more oil. This absorbed oil is lost and must be replaced more frequently.
Let fried foods drain properly over the fryer before moving them. This returns excess oil to the tank rather than losing it with the food. Invest in proper draining racks positioned over the fryer.
Cover your fryer when not in use. This prevents dust and debris from falling into the oil. It also slows oxidation by reducing air exposure.
Troubleshooting Common Problems
Even with good fryer maintenance tips, problems occasionally arise. Knowing how to identify and address issues quickly prevents them from becoming serious.
If your oil foams excessively, it’s usually too old or contaminated with soap residue. Replace the oil and ensure you’re rinsing thoroughly after cleaning. Foaming oil cooks unevenly and can overflow.
Dark oil with burnt smell indicates it’s breaking down too quickly. Check your temperature settings and ensure you’re not overheating. Also filter more frequently to remove particles that accelerate breakdown.
Unusual odors can mean several things. A fishy smell might indicate the oil is rancid and needs replacement. Chemical odors suggest contamination, possibly from cleaning products. Always rinse thoroughly and use food-safe cleaners.
If your fryer heats slowly or unevenly, heating elements might have buildup. Clean them according to manufacturer instructions. Persistent heating problems might require professional repair.
Leaking drain valves need immediate attention. Tighten connections or replace gaskets as needed. A leaking valve is both messy and potentially dangerous.
Disposing of Old Oil Responsibly
Eventually, every batch of oil reaches the end of its useful life. Proper disposal protects the environment and keeps your plumbing system working correctly.
Never pour oil down drains. This causes clogs and damages pipes. Oil solidifies in cold pipes and combines with other materials to create blockages that require expensive repairs.
Many communities have oil recycling programs. Check with your local waste management department about drop-off locations. Used cooking oil can be converted into biodiesel and other products.
For small quantities, let oil cool completely and pour it into a sealed container. Place this container in your regular trash. Old milk jugs or coffee cans work well for this purpose.
Commercial kitchens typically contract with oil recycling services. These companies provide containers and regular pickup. Many even pay for used oil because of its recycling value.
Some animal shelters accept used cooking oil for making soap. Contact local organizations to see if they have use for your old oil.
Maintaining Different Fryer Types
Various fryer designs require slightly different approaches. Understanding your specific model helps you clean it more effectively.
Electric countertop fryers are common in homes. These usually have removable oil containers that make draining and cleaning easier. Follow the same filtration and cleaning steps but take advantage of removable parts for thorough cleaning.
Gas fryers in commercial settings often have built-in filtration systems. Learn how to operate these systems properly. They require their own maintenance schedule, including filter changes and pump inspections.
Pressure fryers combine pressure cooking with frying. These require special attention to gaskets and seals. Always ensure pressure valves and safety features work correctly. Never attempt to open a pressure fryer while it’s still pressurized.
Open pot fryers are traditional restaurant equipment. They lack automated filtration but are simple to maintain manually. The large capacity means oil changes require more effort but follow the same principles.
Ventless fryers use filtration systems to reduce smoke and odors. These filters need regular replacement according to manufacturer schedules. Neglecting filter changes reduces effectiveness and creates fire hazards.
Professional Help and When to Call
Some situations require professional assistance. Knowing when to call a technician saves time and prevents further damage to your equipment.
Electrical problems should always involve professionals. If your fryer won’t heat, trips breakers, or shows signs of electrical damage, don’t attempt repairs yourself. Licensed technicians have the tools and knowledge to safely fix electrical issues.
Persistent heating problems might indicate failing elements or thermostats. While you can clean components yourself, replacing heating elements requires professional skills in most cases.
If your commercial filtration system malfunctions, contact the manufacturer or service provider. These complex systems have pumps, valves, and filters that need expert attention.
Regular professional inspections make sense for commercial operations. Technicians can spot potential problems before they cause breakdowns during busy service periods.
When purchasing a new fryer, consider service agreements. The upfront cost often pays off in faster repairs and priority service when problems occur.
Conclusion
Cleaning a deep fryer with proper oil filtration doesn’t have to be an overwhelming task. By following systematic procedures and maintaining regular schedules, you can keep your equipment in excellent condition. The process starts with understanding why cleanliness matters for both food quality and safety.
Proper filtration extends oil life significantly while improving the taste of everything you cook. Combined with thorough tank cleaning and attention to external components, these practices ensure your fryer operates efficiently for years. Remember that safety always comes first when working with hot oil and electrical equipment.
Creating and following a maintenance schedule prevents minor issues from becoming major problems. Whether you’re managing a busy commercial kitchen or cooking at home, consistent care pays dividends in equipment longevity and food quality. The investment of time in proper kitchen appliance care and following sound fryer maintenance tips results in better-tasting food, lower operating costs, and safer cooking conditions for everyone.
Frequently Asked Questions
How often should I filter my deep fryer oil?
For commercial kitchens with heavy use, filter oil at least once daily, preferably at the end of each service period. Home users should filter after every three to five uses or whenever the oil appears cloudy or contains visible particles. Frequent filtration extends oil life and maintains food quality significantly better than infrequent cleaning.
Can I mix different types of cooking oil in my fryer?
Mixing different oils is generally not recommended. Various oils have different smoke points and flavor profiles that don’t always combine well. If you must mix oils, combine only similar types like two vegetable oils. Never mix animal fats with vegetable oils as they have vastly different properties and breakdown rates.
What’s the best temperature for filtering oil?
The ideal filtration temperature is around 200 degrees Fahrenheit. At this temperature, oil flows easily through filters while remaining cool enough to handle safely with proper protection. Oil that’s too cold becomes thick and filters slowly, while oil that’s too hot poses burn risks and may damage filter materials.
How can I tell when oil needs complete replacement rather than just filtering?
Replace oil when it becomes very dark brown or black, develops a rancid or burnt smell, produces excessive smoke at normal cooking temperatures, or foams heavily when heating. Additionally, if food consistently tastes off despite fresh ingredients, the oil has likely broken down beyond recovery and needs replacement.
Is it safe to clean a fryer with the heating element still attached?
Most fryers have immersed heating elements designed to withstand water during cleaning. However, always consult your manufacturer’s instructions first. Ensure the fryer is unplugged and cooled before adding water. Some fryer models have removable elements that should be taken out before water cleaning, while others are built for submersion cleaning.
Related Topics:
Kitchen Sponge Alternative That Doesn’t Smell
KitchenAid Pasta Maker Attachment Review: A Must-Have Upgrade