

When bathtub handles are broken or faucets are leaking, it may seem like a difficult task to replace them. However, with some basic plumbing knowledge and the appropriate tools, it is possible to complete the task as a DIY project. In this guide, I’ll walk you through the complete process of replacing bathtub handles and faucets, from choosing the right replacements to installing them properly.
Choosing New Bathtub Handles and Faucet
The first step is picking out the new bathtub handles and faucets that will work with your existing tub and plumbing. Here are some key things to consider:
Style
Think about the overall style you want for your bathroom. Modern chrome? Classic porcelain knobs? Sleek single-handle lever? Make sure to choose handles and a faucet that matches the look you’re going for.
Finish
Polished chrome, brushed nickel, oil-rubbed bronze – the finish impacts the style and durability. Chrome and nickel resist water spots, while bronze will develop a patina over time.
Quality
Look for solid brass or stainless steel construction. Plastic pieces may be cheaper but won’t last as long. Be sure to read reviews to ensure high quality and longevity.
Ease of Use
If you have mobility issues, explore how to replace a two handle bathtub faucet with single-lever handles that are easier to turn on and off than knob styles. Hands-free faucets are also an option, providing a convenient and accessible solution for individuals with limited dexterity.
Flow Rate
Check the gallons per minute (GPM). Most faucets today are designed to use less water. Make sure to get one with a flow rate that meets your needs.
Valve Type
Cartridge and ceramic disc valves are known for their durability and longevity, often outlasting compression valves. Ball valves also demonstrate a commendable level of durability. When it comes to maintaining your plumbing fixtures, it’s essential to know how to replace a two handle bathtub faucet. Regular maintenance ensures the smooth functioning of these valves, extending their lifespan and preventing potential issues.
Number of Holes
Know how many holes are on your existing tub before purchasing. Most have 3 holes, but some older tubs have 2 or 4.
Once you’ve selected the ideal bathtub handles and faucets, it’s time to prepare for installation.
Preparing for Installation
Replacing the handles and faucet requires a bit of planning and prep work. Follow these key steps:
Turn Off Water Supply Lines
Locate the shut-off valves for the hot and cold water lines under the tub and turn them clockwise to shut off the water. This prevents leaks during the project.
Disconnect Supply Lines
Under the tub, disconnect the flexible supply lines from the bottom of the faucet by unscrewing the nut that secures each line with adjustable pliers or a wrench.
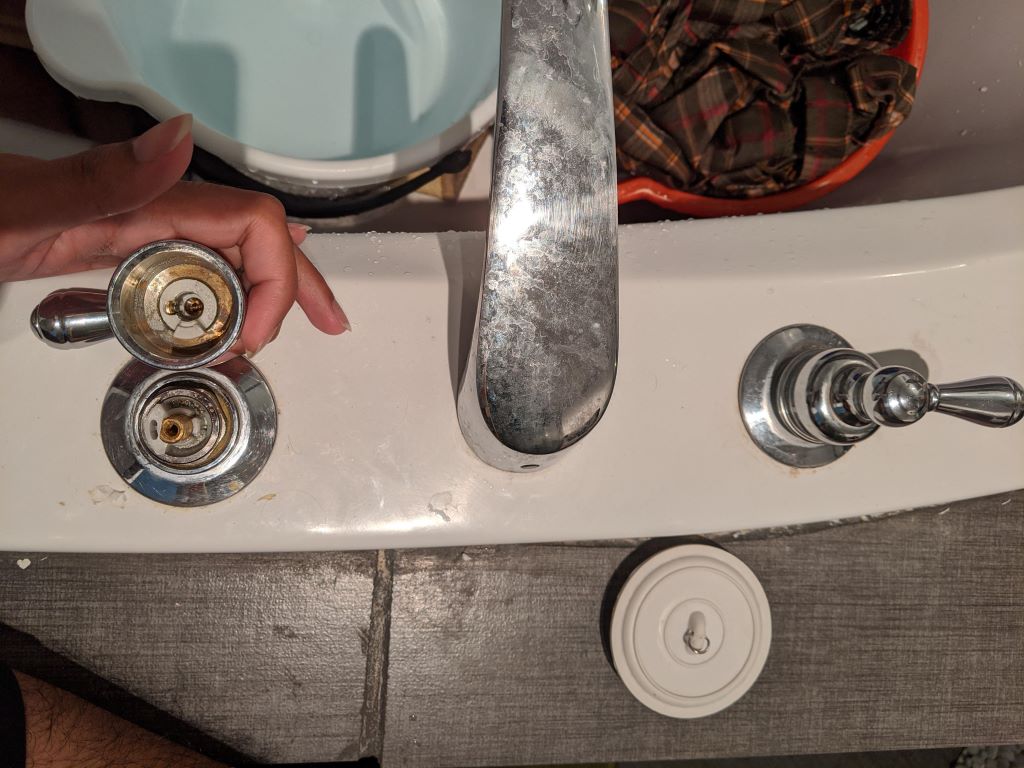
Remove Old Handles & Faucet
Take out the screw that holds each handle in place. Pull the handles straight out. Unscrew the nut that secures the faucet to the underside of the tub and lift out the old faucet.
Clean Surface Area
Use a scrub brush and bathroom cleaner to thoroughly clean the surface around the faucet holes. This ensures a tight seal with the new hardware.
Gather Tools & Materials
You’ll need a plumber’s putty, adjustable wrench, Phillips head screwdriver, tube of silicon caulk, Teflon tape, rag, flashlight, bucket, and new supply lines.
Prepping takes a bit of time upfront, but it makes installation much smoother.
Installing New Bathtub Handles
Once you’ve prepped the area, you’re ready to install the new handles. Follow these steps:
Apply Putty to Underside
Roll plumber’s putty into a rope and press it onto the underside of each handle base, forming a ring around the base. This seals the handles to the tub.
Insert Handles & Secure
Align the handle bases over the handle holes in the tub. Press down firmly while inserting and twisting slightly. The putty should seal the bases tightly to the tub.
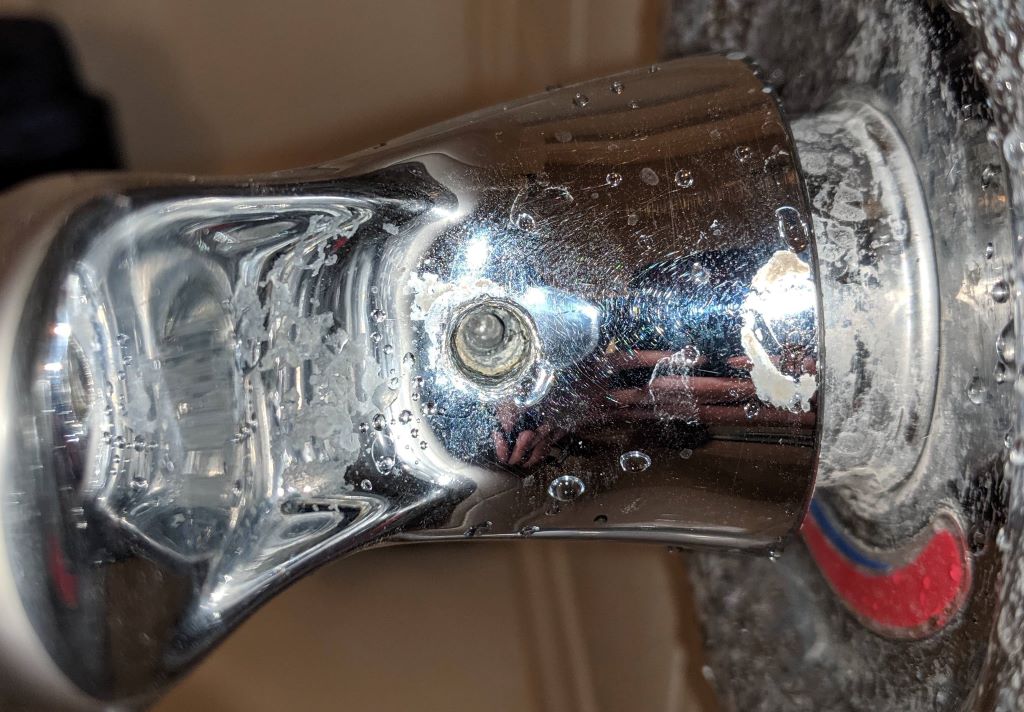
Tighten Set Screws
On the underside of each handle base, tighten the set screws with a screwdriver. This holds the handles securely in position.
Attach Decorative Caps
Slide any decorative caps or covers for the handle bases into place so they conceal the set screws.
Test Handles
Turn the hot and cold handles to ensure they rotate smoothly and completely shut off the water flow. Adjust as needed until operational.
Take care to position the handles correctly so hot is on the left and cold is on the right. The new handles should work like a charm!
Installing the New Bathtub Faucet
Replacing the faucet takes a bit more effort, but follow these steps to complete it successfully:
Apply Putty to Faucet Base
Just like with the handles, roll the plumber’s putty into a rope and press it onto the underside of the faucet base to seal it when installed.
Feed Lines Through Holes
From above the tub, feed the hot and cold supply lines on the new faucet through the appropriate holes.
Position Faucet & Secure
Set the faucet base evenly over the holes. From underneath, slide the metal bracket, washer and mounting nut over the supply lines and threaded faucet shanks. Hand tighten the mounting nut.
Connect Supply Lines
Connect the flexible supply lines to the threaded faucet shanks, ensuring red for hot and blue for cold. Tighten securely with wrench.
Wrench Tighten Mounting Nut
Use a wrench to tighten the mounting nut further, securing the faucet tightly to the tub. Don’t over tighten.
Turn On Water & Test
Turn the hot and cold shut-off valves back on. Check for any leaks at connections. Turn the faucet on to test water temperature and flow.
With the new faucet installed, give it a thorough test drive to make sure all is working properly before finishing up.
Finishing Touches for a Watertight Seal
To complete the project, just a few more finishing steps will ensure your new handles and faucet last for years while preventing leaks:
Seal Edges with Caulk
Apply a bead of tub and tile caulk around the edges of the handles and faucet base where they meet the tub surface. Smooth with finger.
Replace Supply Line Washers
If existing supply line washers appear cracked or worn, wrap new ones with Teflon tape to prevent leaks.
Check for Drips
Let the caulk dry completely, then test the handles and faucet for several minutes. Inspect for any drips or leaks. Re-apply caulk if needed.
Clean Up the Area
Remove all old putty, clean up tools, and thoroughly wipe down the tub with a clean rag when finished.
Taking your time with the final sealing and leak prevention steps helps guarantee your new bathtub hardware stays drip-free for many years of daily use.
Tips for a Smooth Installation
Replacing bathtub handles and a faucet is very doable with the right techniques. Here are some additional tips:
- Turn off the water at the main shut-off valve before starting, just to be safe.
- Have a bucket and towels ready to catch any water in lines during install.
- Use adjustable wrenches over pliers to prevent scratching fixtures.
- Don’t over tighten nuts and connections – just snug is tight enough.
- Lubricate rubber gaskets with a bit of silicone grease before inserting.
- Replace old supply lines rather than reusing if corrosion is visible.
- Keep all parts organized during removal so you know exactly how to reinstall.
Taking it slowly and following each step carefully will result in a successful handle and faucet replacement you can enjoy using for years to come. The improvement to your bathroom will be well worth the effort!
Frequently Asked Questions
Q: How do I remove old bathtub handles?
A: Use a screwdriver to remove the small screw on the underside of each handle base. This will allow you to lift the handles up and off the tub. Handles are typically held in place with this single screw.
Q: Can I replace just the bathtub handles and not the faucet?
A: Yes, you can replace the handles independently, as long as the existing faucet is still in good working order. Make sure to choose new handles that will properly fit the existing faucet valve stems.
Q: What is the best way to remove an old corroded faucet?
A: If the mounting nut under the tub is very corroded, you may need to carefully pry the old faucet loose with a flat head screwdriver. Take care not to damage the tub surface. Penetrating oil or WD-40 can help loosen the connections.
Q: How do I stop my new faucet from leaking?
A: Make sure to apply plumber’s putty evenly underneath the faucet base before installing. Then caulk around the edges for a watertight seal. Tighten the mounting nut securely but do not over tighten. Also replace old supply line washers.
Q: Can I upgrade to a single-handle faucet from two handles?
A: Yes, as long as there are the correct number and placement of holes in your existing tub to support a single-handle faucet. This may require some adjustments to the hot and cold supply lines as well.
Conclusion
Replacing worn-out or leaking bathtub handles and faucets can give your bathroom a fresh new look and feel. By carefully following the steps for proper removal of old hardware, preparation of the tub area, installation of new handles and faucet, and sealing up leaks or drips, you can take on this project yourself. Why is my spa draining when I turn it on? To troubleshoot this issue, pay attention to the existing fixtures and plumbing, take your time, and be thorough for best results. With some basic tools and a bit of patience, you’ll have your spa functioning flawlessly, turning your relaxation space into a rejuvenating haven once again.