

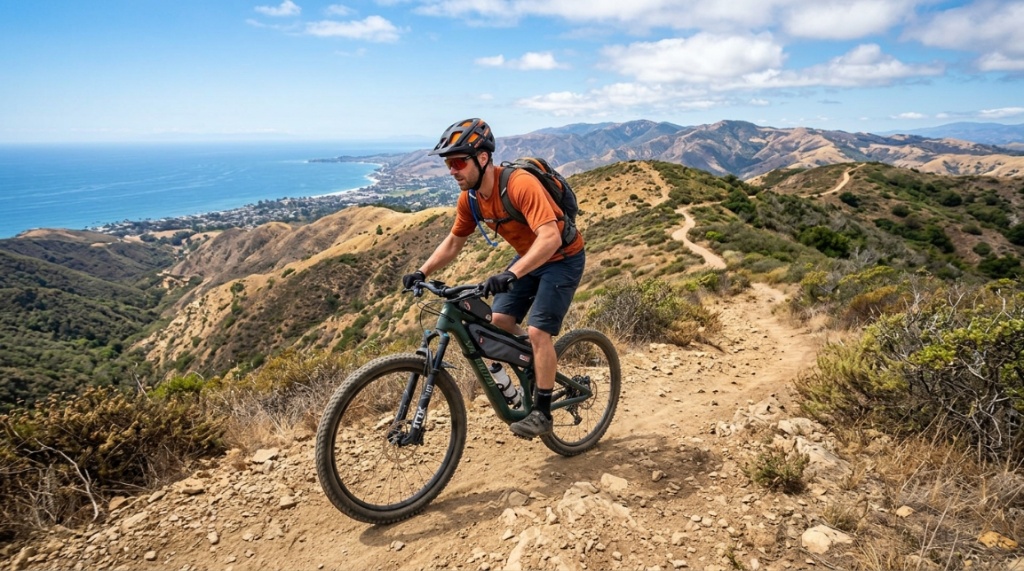
You’ve just rolled up to a trailhead in Marin County, hydration pack half-full, pockets stuffed with snacks, and a phone battery draining faster than your legs on the switchbacks. Sound familiar? The problem is clear: riding California’s diverse terrain—from the bone-dry chaparral of the Sierra foothills to the foggy coastal singletrack—demands gear that’s accessible, secure, and lightweight. Dragging a bulky backpack throws off your center of gravity and turns your back into a sweat lodge. The solution is a bike frame bag, a minimalist storage system that keeps your essentials within arm’s reach without compromising handling. But simply bolting one on isn’t enough. In this guide, I’ll show you exactly how to choose, pack, and ride with a bike frame bag for California trails, ensuring your next adventure is smooth, organized, and genuinely enjoyable.
What Makes a Frame Bag Different from Other Bike Bags on California Trails?
A frame bag fits inside the main triangle of your bicycle frame, between the top tube, down tube, and seat tube. Unlike seat packs or handlebar rolls, it keeps weight low and centered, which is crucial for maintaining stability on technical descents and rocky climbs. For California’s varied conditions—from the loose granitic sand of the High Sierra to the slick adobe mud of the Central Coast—this low center of gravity translates directly into better bike control. You’re not swinging weight from side to side like you would with a handlebar bag, and you’re not carrying mass on your body like a backpack. This is the primary reason why experienced endurance riders and bikepackers prefer this style for long days in the Golden State.
Key Design Features to Look For
Not all frame bags are created equal. For California’s microclimates, you need a bag that can handle temperature swings and unexpected drizzle. Look for a durable, water-resistant fabric like laminated nylon or TPU-coated Cordura. Consider the zipper quality—waterproof zippers (like YKK AquaGuard) are essential for creek crossings in the Sierras. Also, examine the seam taping; if seams aren’t sealed, water will creep in during a surprise afternoon thunderstorm near Tahoe.
How Weight Distribution Affects Handling
When you load a frame bag, you are placing mass within the wheelbase. This lower, centralized placement actually improves the bike’s inertial characteristics. You’ll find that the bike tracks straighter through high-speed corners and feels less “twitchy” during steep, out-of-saddle climbs. On the flip side, excessive weight in a frame bag can make tight, switchback climbing feel sluggish. The trick is to pack strategic weight—heavy tools low, light items like a windbreaker near the top.
Mounting Systems: Bolted vs. Strapped
Most production frame bags use Velcro straps around the top and down tubes. This is versatile and works on almost any frame. However, for rough, rocky trails, a secure fit is non-negotiable. If you have mounting bolts on your frame (often used for water bottles), invest in a bag with a bolted attachment plate. This prevents the bag from sliding down the down tube or abrading your frame’s paint over time. A properly mounted frame bag should not move a millimeter even when you’re bouncing down a washboard road in Anza-Borrego.
Why Should You Choose a Frame Bag Over a Backpack for California Rides?

Choosing to ditch the backpack in favor of a frame bag is one of the most impactful ergonomic upgrades you can make. When you wear a pack, you’re adding weight to your torso, which increases your heart rate and metabolic cost. On long climbs—like the grueling grind up Mount Tamalpais—that extra heat trapped against your back can lead to early fatigue and poor decision-making. A frame bag alleviates this by transferring the load to the bike, allowing your body to breathe freely. This is particularly vital in California’s warm inland valleys where temperatures can easily exceed 90°F from May through October.
Reducing Physical Strain and Sweat
Riding with a backpack creates a sweaty back, which in cooler coastal climates like San Francisco, can lead to chills during a descent. By moving your gear to a frame bag, you promote better airflow across your jersey. This thermoregulation is critical for maintaining stamina and enjoyment. You’ll feel a significant difference in comfort, especially on rides longer than two hours.
Enhancing Aero Dynamics and Speed
A bulky backpack acts like a sail, catching crosswinds and slowing you down. A frame bag, on the other hand, is tucked neatly behind your front wheel and in front of your rear wheel where the airflow is already turbulent. The reduced drag makes it easier to hold a steady pace on flat sections, like the bike paths along the American River Parkway. By keeping your profile as slim as possible, you conserve energy and ride faster, further, with less effort.
When a Backpack Might Still Be a Better Choice
There are times when a backpack is a necessary evil. For extremely technical, steep, and short shuttle runs (like downhill trails at Mammoth), a full-face helmet makes a frame bag the only logical choice because you cannot wear a pack comfortably. Also, if you are carrying a heavy DSLR camera or a hydration bladder, a backpack’s weight distribution on your body may be preferred to overloading your bike. However, for 95% of cross-country and all-mountain trail riding, a frame bag is superior.
How Do You Pack a Frame Bag for a Full Day on the Trail?
Packing a frame bag is all about prioritizing accessibility and maintaining balance. The bag is long and narrow, so you need to segment it into zones. In the “nose” (the part closest to the head tube), you put items you need quickly—snacks, phone, keys. the “belly” (the middle section), you put heavier items like tools, tire levers, and a mini-pump. the “tail” (near the seat tube), you place items used less frequently, like a rain shell or a spare tube. By keeping heavy items near the middle and bottom, you maintain a stable bike geometry.
Step-by-Step Packing Strategy for a Multi-Hour Epic
First, place a mult-tool in a protective sleeve against the bottom of the bag, centered on the frame. Next, slide an extra tube and tire levers along the bottom, flanking the tool. Now, layer a lightweight windbreaker or an emergency blanket on top of these tools. Third, put your phone and keys in the nose pocket, ensuring they are easily accessible but not pressing against the zipper. Finally, fill any gaps with energy bars or a small bag of trail mix. This system prevents rattling and keeps essential repair gear stable.
Pro Tips for Balancing Weight Distribution
Aim to keep the weight low and evenly distributed from left to right. Avoid placing all heavy items on one side, as this will pull the bike to one side when you’re riding no-hands or navigating tricky terrain. Use small stuff sacks or ziplock bags to consolidate items—this prevents them from shifting into awkward spots. Also, leave a little empty space at the top of the bag to allow for easy zipping; overstuffing puts stress on the zipper and can lead to failure.
What Not to Put in a Frame Bag
Do not store liquids (water bottles, hydration bladders) in a frame bag if you can avoid it. If a bottle leaks, it will soak your tools and electronics. High-value, sensitive electronics like a cycling computer or a camera should be wrapped in a dry bag before insertion. Also, never store CO2 cartridges loose—they can bang against your frame and cause damage to the bag or your tubes. Always wrap them in a cloth or keep them in a dedicated holder.
Which Frame Bag Size Fits Your California Trail Bike?
Choosing the correct frame bag size is critical for both function and safety. The bag should fit within your frame’s main triangle without interfering with your knees or the front wheel. To find the right size, you must measure the “head tube to seat tube” length and the “down tube to top tube” height at multiple points. A bag that’s too long will interfere with your front tire when turning; a bag that’s too tall will hit you in the knees while pedaling. Most manufacturers provide measurements like “small” (fits 16-18″ frames) or “large” (fits 19-21″ frames), but you should always verify with your specific frame geometry.
Measuring Your Frame Correctly
To measure, use a flexible tape measure. First, measure the distance from the center of your head tube to the center of your seat tube along the top tube. This is your “top tube length.” Second, measure the distance from the top tube down to the down tube at the seat tube junction—this is your “down tube height.” Compare these numbers to the bag’s specification sheet. If you are between sizes, size down to ensure proper steering clearance for the front wheel.
Common Sizing Mistakes and Safety Risks
The most common mistake is buying a bag that’s too tall. When you’re out of the saddle sprinting, your knees come up high, and they will hit the top of the bag. This is not just annoying—it’s a safety hazard, as it can cause you to lose pedal stroke precision. Another frequent error is buying a bag that’s too long; this restricts your ability to do sharp, low-speed turns. Always check for clearance by turning your handlebars fully to the left and right before you commit to a ride.
Testing Fit Before a Long Ride
Before you head to the mountains, do a “garage test.” Mount the bag on your bike, put your bike on a trainer or lean it against a wall, and simulate pedaling. Watch your knees and the front wheel. If you have clearance, then you are good to go. Take a quick lap around the block, hitting a few curbs, to ensure the bag stays secure and doesn’t interfere with your riding positions.
When Is the Best Time to Use a Frame Bag in California?
Frame bags are useful year-round, but they truly shine during the “shoulder seasons”—spring (March to May) and fall (September to November). During these windows, California’s weather is unpredictable, but the trails are in prime condition. You need layers (a wind vest, a lightweight jacket) that you can stash in a frame bag when the sun comes out mid-ride. In the summer, a frame bag is ideal for carrying extra water purification tablets, sunscreen, and energy gels. In the winter, it’s proficient for carrying a waterproof shell and heavy gloves.
Seasonal Gear Packing Checklists
For winter, always carry a base layer top, a mylar emergency blanket, and hand warmers in case you break down in the cold.
Adapting to Microclimates (Coastal vs. Inland vs. Mountains)
California’s diversity is staggering. On the coast (e.g., Big Sur or Santa Cruz), visibility can drop in an instant, and temperatures stay cool—carry a high-visibility vest. Inland (e.g., Folsom or Auburn), temperatures can swing by 30 degrees from morning to noon, so pack a light jersey and a shell. In the mountains (e.g., Lake Tahoe), afternoon lightning storms are common in summer, so you must carry a waterproof jacket and a whistle. A frame bag’s volume allows you to be prepared for all these shifts without overpacking.
Special Events and Endurance Races
For events like the “Lost and Found” gravel race or the “Tahoe Trail 100,” a frame bag is non-negotiable. These events require you to carry mandatory gear (space blanket, whistle, extra tube) but don’t allow support vehicles. A frame bag keeps this gear accessible at all times. When you’re grinding up a steep hill, you don’t want to stop and unzip a backpack; you want to just reach down and grab a gel. For these high-stakes days, a well-organized frame bag is a competitive advantage.
How to Maintain and Clean Your Frame Bag After a Muddy Ride
California trails can range from hero dirt to deep, sticky adobe mud, especially in the winter months in the North Bay. After a ride on wet, muddy trails, you need to clean your frame bag to ensure its longevity. Start by removing the bag from the bike. Use a soft nylon brush or a gentle hose setting to remove loose dirt and grit. Avoid using high-pressure water, as it can force water past the zippers. Then, use a mild soap (like dish soap or a specialty tech wash) and a sponge to wipe down the exterior. Rinse thoroughly, but do not submerge the bag.
Drying and Storing Tips
Drying is the most critical step. Always air-dry the bag completely before storing it. Leave it unzipped and hanging in a cool, dry place out of direct sunlight. If you store the bag while damp, you risk developing mildew, which will weaken the fabric and cause a musty smell. Never put a frame bag in a clothes dryer. Once fully dry, store it in a dry room—ideally unzipped to keep the seals fresh. If you ride in wet conditions often, consider applying a seam sealer or a fabric waterproofer (like Nikwax) every few months to maintain its water resistance.
Zipper Care and Lubrication
Zippers are the most vulnerable point on any frame bag. Dirt and salt from your legs can gum up the zipper. After every few rides, clean the zipper teeth with an old toothbrush to remove debris. Then, apply a dry-film lubricant (like a silicone spray) to the zipper to keep it sliding smoothly. Do not use grease or heavy oil, as this will attract more dirt. A well-lubricated zipper reduces stress on the pull tab and prevents it from breaking off mid-ride.
Repairing Minor Rips and Scuffs
Despite your best efforts, you may catch a branch or rub against a rock. For small rips in the fabric, use a patch kit designed for nylon tent repairs. Apply a patch to the inside of the bag for structural integrity and one on the outside for sealing. For scuffs on the outer material, these are purely cosmetic and don’t affect performance. However, if the scuff is deep enough to expose the fabric weave, you should seal it with a tiny drop of seam grip to prevent it from expanding.
Can You Use a Frame Bag on an E-MTB in California’s Hill Country?
Absolutely, and it’s highly recommended. E-MTBs have longer travel and heavier frames, which means they handle weight well. A frame bag is a great way to carry a battery charger or an extra jacket without interfering with the bike’s motor or battery mount. However, you need to ensure the bag doesn’t obstruct the battery removal system. Many e-bike batteries slide out from above the downtube; a frame bag mounted too high can block this. Take extra care to size the bag below the top tube junction where the battery ports are.
Specific Considerations for Heavy, Longer-Travel Bikes
On a long-travel e-MTB, the rear suspension is very active, which means the seat tube and down tube move significantly. You need a frame bag that has ample clearance from all moving parts. Also, because e-MTBs are heavier, you are less likely to stand up and sprint, so a slightly taller bag may not interfere with your knees as much. Still, avoid overloading the bag with dense tools; use it for lightweight essentials like a spare tube, a small pump, and snacks. The battery already adds considerable weight, so keep the center of gravity as low as possible.
Power Bank and Smartphone Storage Solutions
If you are using a frame bag on an e-bike for a long ride, dedicate a specific, padded compartment for a power bank to charge your phone or GPS. Wrap the power bank in a microfiber cloth to prevent rattling and short-circuiting. Route a short USB cable from the power bank to your handlebar-mounted phone. This setup allows you to navigate all day without worrying about battery drain, which is a killer on long California backcountry loops like the “Downieville Downhill.” Check that your frame bag has a port or hole for the cable; if not, thread it gently between the zipper seals.
Where Are the Best California Trails for Testing a New Frame Bag?
California offers a lifetime of testing grounds. For beginner-friendly terrain, I recommend the American River Parkway in Sacramento—35 miles of paved and dirt trails with no technical sections. It’s perfect for testing your bag’s stability and comfort. For intermediate riders seeking challenge, China Camp State Park in Marin County is a top pick. It offers flowing singletrack, short steep climbs, and a few technical rock gardens, all within a forested environment. This will test how the frame bag handles low-speed balance and maneuvering. For advanced riders, Downieville Downhill in the Sierra Nevada is legendary—17 miles of relentless descent with rocky, loose sections. This track will reveal any drawbacks in your bag’s stiffness or mounting security.
Coastal Singletrack: The Pacific Coast Trail (PCT) Sections
Riding near the coast, such as the Connector Trail in Point Reyes, presents unique challenges: fog, moisture, and steep climbing. The marine layer can leave everything damp, so your frame bag’s water resistance is put to the test. Focus on packing essentials in small drybags within your frame bag. The cool, humid air also means you’ll likely start with a jacket and shed it quickly, so you need quick access to storage.
Inland Deserts and High Desert Climbs (Joshua Tree Area)
Trails near Joshua Tree National Park are dusty, harsh, and hot. Here, a frame bag is useful for carrying a hydration-specific tool kit and high-SPF sunscreen. The main concern is dust infiltration. Ensure your bag has a dust-proof, water-resistant zipper and that you close it securely after every stop. The dry air means you’ll drink more water, so you may still need a water bottle on the frame. Use the frame bag for tools and snacks.
Sierra Nevada High Country (Lake Tahoe Rim Trail)
The Tahoe Rim Trail is famous for its varied surfaces, from smooth forest soil to sharp granite slabs. Elevation is a factor (over 7,000 feet), so you can’t afford respiratory fatigue from a backpack. A frame bag is perfect for carrying an extra layer, a full-size pump, and high-calorie snacks. The challenge here is the abrupt temperature drop when the sun sets behind the peaks; you’ll need to have a windbreaker accessible immediately. The bag keeps everything close, allowing you to access it quickly without dismounting.
Is a Frame Bag Worth the Investment for Casual Weekend Riders?
Yes, even if you only ride on weekends for fun, a frame bag offers a huge return on investment. The convenience of having your phone, keys, wallet, and a snack right there on the frame is undeniable. It eliminates the “pocket bulging” problem and the annoyance of a sweaty backpack. If you are on the fence, starting with an affordable, high-quality option makes sense. You don’t need to spend $200 to get a durable, functional bag. There are excellent budget-friendly models that serve the purpose well, and you can upgrade later as your needs evolve.
Cost vs. Convenience: Entry-Level Options That Work
Entry-level frame bags are typically made of heavier materials and may lack a stiff internal liner, but they are perfectly functional for a few hours on the bike. You can find options from brands like Rock Bros or Topeka that attach securely and close with durable zippers. These are perfect for rides where you primarily need to carry a phone and a few snacks.
When to Upgrade to Premium Materials
If you find yourself riding more than once a week in variable weather or starting training for endurance events, you should upgrade to a premium bag made with waterproof fabric (e.g., Dyneema or X-Pac) and welded seams. Premium bags also have internal stiffeners that prevent the bag from bulging into your leg. This bulging is a common annoyance on cheaper bags. Additionally, premium zippers are smoother and last longer, and the attachment systems are often more secure, protecting your frame’s paintwork. Consider this a long-term investment in your riding comfort.
When you are ready to upgrade, finding the right, affordable option is key. There are many choices in the market, but if you’re looking for a blend of quality and cost, I recommend checking out a curated list of the best bike frame bag for california trails available today.
What Are the Hidden Dangers of a Poorly Secured Frame Bag?
A poorly fitted or loosely strapped frame bag is not just an annoyance—it’s a serious safety hazard. If the bag shifts forward, it can rub against the front tire. If it shifts backward, it can jam the rear derailleur cable or even the rear tire on full-suspension bikes. The most dangerous scenario is when the bag slips off the frame entirely during a high-speed descent, getting tangled in your crankset or braking mechanism. Such an incident could cause a severe crash. Therefore, inspecting your attachment straps and hardware before every ride is non-negotiable if you ride with a frame bag,Before heading out on your next adventure with your gear packed securely, check out our guide on why 26-Inch Electric Bikes Are Popular Among Outdoor Riders for your next trail ride.
Signal Loss and Interference with Bike Electronics
Frame bags are often positioned near the bike’s steering tube, where some riders mount wireless sensors or a cycling computer. Large, bulky frame bags shouldn’t interfere with Bluetooth or ANT+ signals, but if the bag is stuffed with a heavy metal tool, it could potentially cause signal reflections and reduce the range of your sensors. To avoid this, keep your tools wrapped in a cloth and positioned away from the front of the bag. Test your computer connection after installing a new bag, and if you see dropouts, move the sensor or reposition the inner contents.
Preventing Theft and Opportunistic Loss
Because frame bags are visible, they can be a target for theft, especially at popular trailheads in touristy areas like Malibu or Lake Tahoe. Never leave your valuable items (phone, wallet) in the bag even if you are just “quickly” using the bathroom at a parking lot. Take valuables with you, or at least lock your bike. Similarly, beware of the “friction” of trailside brush—a zipper can be unzipped easily by a branch catching the tab. Use a bag with a lanyard system or a magnetic closure that resists incidental opening.
FAQs About Bike Frame Bags
What is a bike frame bag used for?
A bike frame bag is a storage pouch that fits inside the main triangle of a bicycle frame. It is used to carry essential gear like spare tubes, multi-tools, snacks, a phone, and lightweight clothing, keeping the rider free from a bulky backpack and lowering the bike’s center of gravity for better handling.
Will a frame bag rub my bike frame paint?
Yes, if the bag is not properly secured or if dirt becomes trapped underneath the straps, it can rub and abrade the paint on your top tube and down tube. To prevent this, always make sure the straps are tight, and consider using a protective clear vinyl film or an old inner tube underneath the straps.
Can I use a frame bag with a full-suspension mountain bike?
Yes, you can. However, you must ensure the bag is sized correctly to allow sufficient clearance from the rear shock and linkage, which moves as you ride. Most full-suspension frames have a larger front triangle, but you must carefully measure the space to ensure the bag will not be crushed by suspension sag.
How do I carry water if I use a frame bag?
You still need water bottles or a hydration pack. A frame bag is typically for tools and gear. Most riders use a bottle cage on the down tube or seat tube for water. If you need extra water capacity, you can use a small frame-mounted water bottle cage adapter or a hydration bladder that fits in the frame bag via a specialized sleeve, though this is less common.
Is a frame bag allowed in competitive races?
Yes, in most cross-country, marathon, and gravel races, frame bags are allowed. However, some ultra-strict road time trials or criteriums may have rules against certain bags due to aerodynamic restrictions. Always check the specific race regulations. For trail and endurance events, they are actually encouraged because they decrease the reliance on support vehicles.
How do I clean a sticky zipper on my frame bag?
First, use a soft brush to remove any dirt or sand stuck in the zipper teeth. Then, apply a small amount of zipper lubricant (like a dry Teflon-based spray) to a cloth and run it along the zipper. Move the zipper back and forth to distribute the lubricant. Avoid petroleum-based lubes as they attract grime.
What should I do if my frame bag gets soaked in rain?
If your bag gets soaked, unzip it as soon as possible and let it dry in a well-ventilated area. First, remove all contents and dry them off. For the bag itself, wipe off excess water and hang it in a shaded spot to dry completely. Once dry, it is crucial to reapply a durable water repellent (DWR) spray or sealant to the exterior fabric to restore its water-resistance capabilities.
Conclusion
Mastering the use of a bike frame bag on California trails transforms your riding experience. You’ll enjoy a cleaner ride, a drier back, and better control over your bicycle, enabling you to focus on the incredible scenery and the physical joy of cycling. From the foggy redwoods of the north coast to the sunburned deserts of the south, the frame bag is your silent companion, keeping your gear safe and your weight in the right place. It’s not just about storage; it’s about upgrading your interaction with the terrain. So measure your frame, pack your bags smartly, and hit the trail with confidence. Your next great adventure in the Golden State is waiting.