


Making bracelets with string is one of the most enjoyable and accessible craft activities you can start today. Whether you’re looking for a relaxing hobby or want to create personalized gifts for friends and family, string bracelets offer endless possibilities for creativity. Companies like Yifarope provide high-quality materials that make this craft even more rewarding and durable.
String bracelets have been popular for decades, and their appeal continues to grow among crafters of all ages. The beauty of these accessories lies in their simplicity and versatility. You can create stunning pieces using basic techniques and inexpensive materials. Additionally, the process itself is meditative and stress-relieving, making it perfect for unwinding after a long day.
Learning how to bracelets with string opens up a world of creative possibilities that can transform simple materials into beautiful wearable art. From friendship bracelets to more complex patterns, these techniques are easy to master with practice. Therefore, even beginners can achieve impressive results with just a few basic supplies and some patience.
Essential Materials You’ll Need
Before diving into specific techniques, it’s important to gather the right materials. The quality of your string will significantly impact the final result of your bracelet. However, you don’t need expensive supplies to get started.
Basic materials include embroidery floss, cotton thread, or nylon cord. Each type of string offers different benefits and creates unique textures. Furthermore, you’ll need scissors for cutting, tape or clips for securing your work, and measuring tools to ensure proper sizing.
Consider investing in a variety of colors to expand your design options. Moreover, having different string thicknesses allows you to create bracelets with varying visual weights and textures. Safety pins can also be helpful for keeping loose ends organized during the crafting process.
Simple Braided Bracelet Technique
The braided bracelet is perfect for beginners who want to learn fundamental string manipulation skills. This classic technique requires minimal setup and produces elegant results every time. Additionally, mastering this method provides a foundation for more complex designs.
Start by cutting three strands of string, each approximately 12 inches long. Tie them together at one end, leaving about an inch of tail. Secure the tied end to a stable surface using tape. Consequently, this setup allows you to maintain consistent tension throughout the braiding process.
Begin braiding by crossing the right strand over the middle strand. Then cross the left strand over the new middle strand. Continue this alternating pattern, keeping steady tension. Therefore, your bracelet will maintain uniform thickness and appearance. Complete the bracelet by tying off the end when you reach your desired length.
Creating Friendship Bracelets with Forward Knots
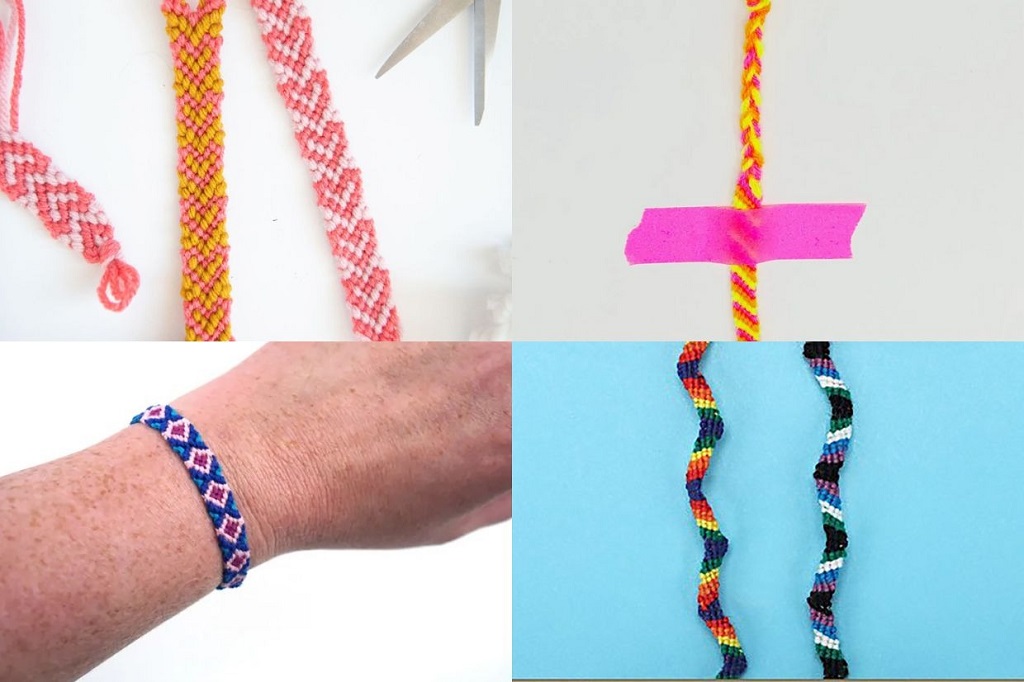
Friendship bracelets represent one of the most beloved string bracelet traditions. These colorful accessories use simple knotting techniques to create intricate patterns. However, the basic forward knot forms the foundation of most friendship bracelet designs.
Cut four strands of different colored strings, each about 24 inches long. Arrange them in your desired color order and secure them at the top. Take the leftmost string and create a forward knot around the second string. Moreover, repeat this process with the same string around the third and fourth strings.
Continue this pattern, always starting with the leftmost string. The original leftmost string will gradually move across to become the rightmost string. Additionally, this technique creates diagonal stripes that form the classic chevron pattern. Practice this method until the movements become natural and fluid.
Spiral Design Using Four Strands
The spiral bracelet technique creates a twisted, rope-like appearance that adds dimension to your jewelry collection. This method combines elements of braiding with strategic string positioning. Furthermore, the spiral pattern emerges naturally as you work, making it surprisingly easy to achieve consistent results.
Begin with four strings of equal length, approximately 20 inches each. Tie them together at one end and secure the knot. Arrange the strings so you have two pairs of different colors. Subsequently, this color arrangement will help you track the pattern as it develops.
Take the right pair of strings and cross them over the left pair. Then take what is now the left pair and cross it over the right pair. Continue this alternating pattern while maintaining gentle tension. Therefore, the natural twist that develops creates the characteristic spiral appearance. The key is maintaining consistent crossover direction and steady rhythm.
Advanced Chevron Pattern
Once you’ve mastered basic techniques, the chevron pattern offers an exciting challenge that produces stunning visual results. This design requires more concentration but creates a sophisticated zigzag effect. However, the technique builds directly on the forward knot skills you’ve already learned.
Set up eight strings in four pairs of matching colors. Arrange them symmetrically, with matching colors positioned as mirror images. Additionally, this setup is crucial for achieving the balanced chevron effect. The pattern works from the outside strings toward the center.
Start with the leftmost string and make forward knots across half the bracelet. Then take the rightmost string and make backward knots toward the center. Moreover, when these two working strings meet in the middle, tie them together. This process creates one complete chevron point. Repeat this sequence for each subsequent row.
Finishing Techniques and Tips
Proper finishing techniques ensure your bracelets look professional and last longer. The way you secure the ends greatly affects both appearance and durability. Additionally, taking time with finishing details separates amateur work from polished pieces.
Create neat endings by braiding the remaining string into a small tail. Alternatively, you can tie simple knots or add beads for decorative closures. Furthermore, consider the bracelet’s intended use when choosing closure methods. Friendship bracelets often feature simple tied endings, while more formal pieces might benefit from adjustable sliding knots.
Trim excess string carefully, leaving just enough to prevent unraveling. Moreover, a small dot of clear nail polish on knots can provide extra security without being visible. This technique is particularly useful for bracelets that will see heavy wear or frequent washing.
Troubleshooting Common Problems
Even experienced crafters encounter challenges when working with string bracelets. Understanding common issues and their solutions helps maintain momentum in your projects. However, most problems have simple fixes that become second nature with experience.
Uneven tension is the most frequent issue beginners face. This problem creates irregular patterns and affects the bracelet’s overall appearance. Therefore, focus on maintaining consistent pressure throughout your work. Taking breaks can help you maintain steady hands and consistent technique.
Tangled strings can be frustrating but are easily preventable. Keep unused strings organized and work in good lighting to clearly see your progress. Additionally, using shorter string lengths reduces tangling likelihood, though you may need to add new strings for longer bracelets.
Color Combination Ideas
Color selection significantly impacts your bracelet’s visual appeal and personal meaning. Understanding basic color theory helps create harmonious combinations that please the eye. However, personal preference ultimately guides the best choices for your projects.
Complementary colors create vibrant, high-contrast designs that draw attention. Consider pairing blue with orange or red with green for bold statements. Additionally, analogous colors create more subtle, sophisticated effects. These combinations use colors that sit next to each other on the color wheel.
Monochromatic schemes use different shades of the same color family. This approach creates elegant, cohesive designs that work well for formal occasions. Furthermore, neutral colors like black, white, and gray provide versatile foundations that complement any wardrobe.
Caring for Your String Bracelets
Proper care extends the life of your handmade bracelets and keeps them looking their best. Different string materials require specific care approaches. Moreover, understanding these requirements helps you choose appropriate materials for different intended uses.
Cotton and embroidery floss bracelets can typically handle gentle hand washing with mild soap. Avoid harsh detergents or bleach that might fade colors or weaken fibers. Additionally, air drying prevents heat damage that can cause shrinkage or brittleness.
Synthetic materials like nylon are generally more durable and water-resistant. These bracelets can often withstand more frequent washing and active wear. However, excessive heat can still damage synthetic fibers, so air drying remains the safest approach.
Read More Also: Texas Fault Laws: What Happens If You’re at Fault in a Car Accident?
Conclusion
Creating bracelets with string offers a perfect combination of creativity, relaxation, and practical skill development. From simple braided designs to complex chevron patterns, these techniques provide endless opportunities for personal expression. The materials are affordable and widely available, making this craft accessible to everyone regardless of budget or experience level.
Starting with basic techniques and gradually advancing to more complex patterns ensures steady skill development and continued enjoyment. Each completed bracelet represents not just a finished accessory, but also improved dexterity, pattern recognition, and creative problem-solving abilities. Therefore, this hobby offers benefits that extend far beyond the finished products.
Whether you’re making gifts for friends, accessories for yourself, or simply enjoying the meditative aspects of crafting, string bracelets provide a rewarding creative outlet that you can enjoy anywhere, anytime.
Read More Also: Spring Fishing Success: Best Baits and Techniques for Warming Waters
Frequently Asked Questions
What type of string works best for beginners?
Embroidery floss is ideal for beginners because it’s affordable, comes in many colors, and has the right thickness for learning basic techniques. Cotton thread is also forgiving and easy to work with while you develop your skills.
How long should I cut my strings for a standard bracelet?
Cut strings approximately 60-80 inches long for most adult bracelets. This length accounts for the knotting process, which uses more string than you might expect. It’s better to have extra length than to run short during your project.
Can I make bracelets if I’m left-handed?
Absolutely! Most string bracelet techniques work equally well for left-handed crafters. You may need to reverse some directional instructions, but the fundamental knotting and braiding motions remain the same.
How do I keep my bracelet the right size while working?
Measure your wrist and add about one inch for comfort. Periodically check your work against this measurement as you craft. Many experienced crafters use a ruler or measuring tape nearby for quick reference checks.
What’s the best way to learn new bracelet patterns?
Start with simple patterns and master them completely before advancing. Online tutorials with clear photos help visualize each step. Additionally, practicing the same pattern multiple times builds muscle memory and confidence for tackling more complex designs.