

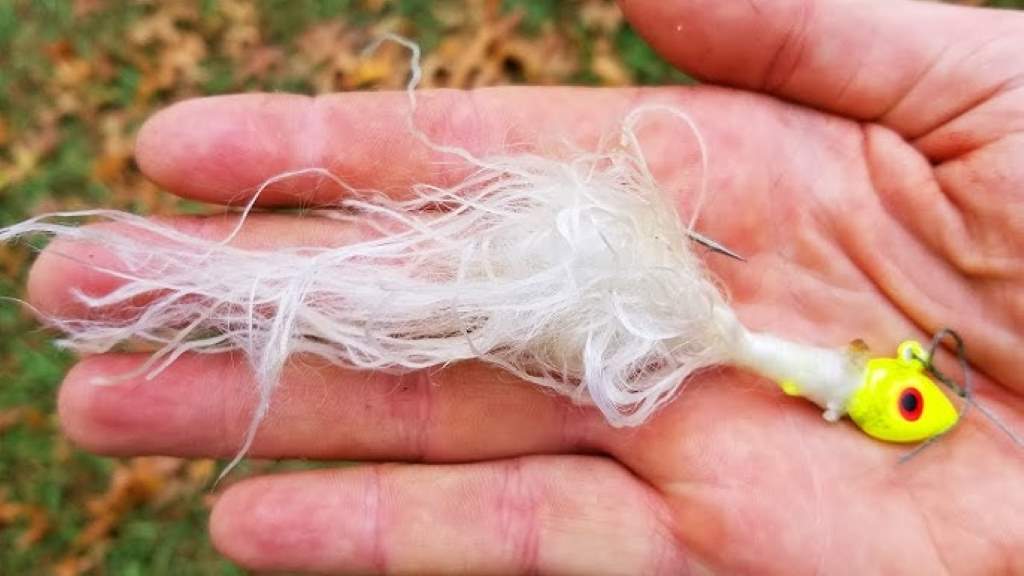
Gar, with their long snouts and razor-sharp teeth, are a thrilling catch for anglers who love a challenge. These prehistoric fish are tough, and their unique anatomy demands specialized gear. A durable rope lure is one of the most effective tools for catching gar, as it entangles their teeth, allowing for a secure hookset. Crafting your own rope lure is not only cost-effective but also customizable to suit your fishing style. This guide, brought to you by Crazy Fishing Gear, will walk you through the process of making a durable rope lure step-by-step, ensuring you’re ready to tackle gar on your next fishing trip.
Why Use a Rope Lure for Gar?
Gar have bony mouths that make traditional hooks less effective. Their teeth, however, are perfect for snagging on fibrous materials like rope. A rope lure works by fraying into strands that tangle in the gar’s teeth, holding them securely until you can land them. Additionally, rope lures are reusable, environmentally friendly, and easy to make at home. Before diving into the crafting process, it’s helpful to understand how to tie a hook to a line for a strong connection, as this skill ensures your lure stays secure during the fight. For a detailed guide on this, check out how to tie a hook to a line.
Materials Needed for a Durable Rope Lure
To create a rope lure that can withstand the thrashing of a gar, you’ll need the right materials. Here’s what to gather:
- Nylon rope: Choose a 1/4-inch or 3/8-inch diameter rope, as it’s strong yet flexible. White or light-colored rope is ideal for visibility.
- Fishing hook: A 3/0 to 5/0 circle or J-hook works well. Ensure it’s sharp and rust-resistant.
- Monofilament or braided fishing line: At least 30-pound test strength for durability.
- Scissors or a sharp knife: For cutting the rope cleanly.
- Lighter or heat source: To melt the rope ends and prevent fraying.
- Epoxy or waterproof glue: To secure knots and add durability.
- Optional weight: A small sinker (1/4 to 1/2 ounce) for casting distance.
- Needle-nose pliers: For handling hooks and tightening knots.
These materials are affordable and widely available at tackle shops or online. For quality gear recommendations, visit authoritative sources for hooks and lines.
Step-by-Step Guide to Making a Rope Lure
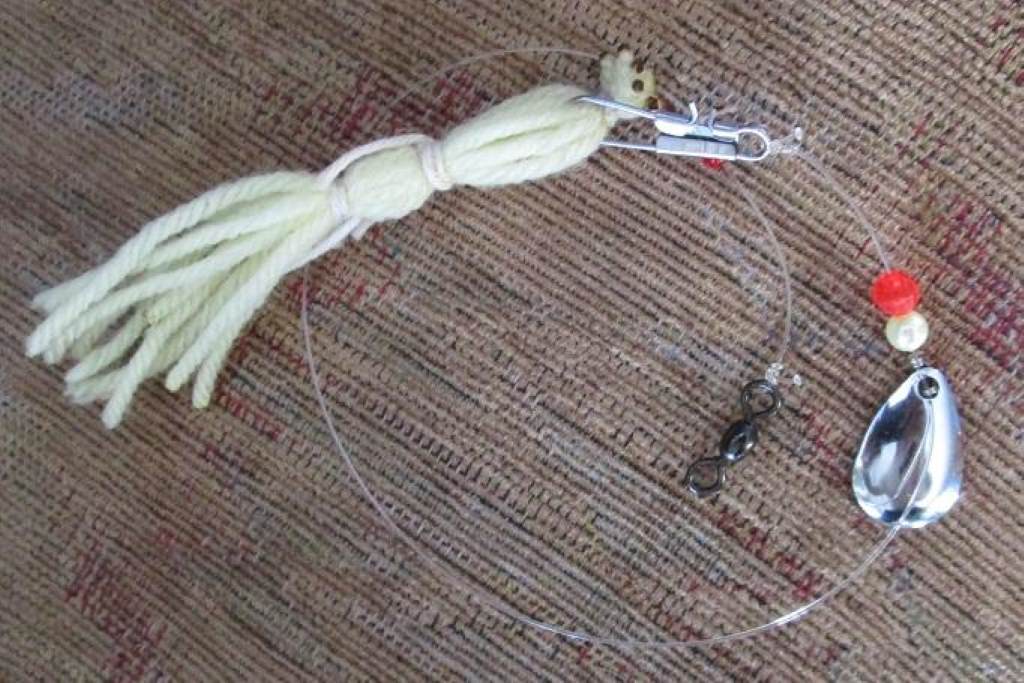
Now that you have your materials, let’s dive into the process of crafting a durable rope lure. Follow these steps carefully for a lure that’s both effective and long-lasting.
Step 1: Cut and Prepare the Rope
Start by cutting a 6- to 8-inch length of nylon rope. This length provides enough material for fraying while keeping the lure manageable. Next, use a lighter to carefully melt both ends of the rope to prevent premature fraying. Be cautious not to burn the rope excessively, as this can weaken it. Once cooled, the ends should feel solid and slightly hardened.
Step 2: Fray the Rope
Take one end of the rope and gently separate the strands to create a frayed, fibrous section about 2-3 inches long. This frayed portion is what will entangle the gar’s teeth. Use your fingers or a comb to tease the fibers apart, ensuring they’re loose but still attached to the main rope. If the rope is too tightly woven, soak it in warm water for a few minutes to make it more pliable.
Step 3: Attach the Hook
Thread the non-frayed end of the rope through the eye of your hook, pulling it through about 1 inch. Fold the rope back on itself to form a loop around the hook’s eye. Secure the loop with a strong knot, such as a clinch knot or Palomar knot. For added strength, apply a small amount of epoxy or waterproof glue over the knot and let it dry completely. This ensures the hook stays in place during aggressive strikes.
Step 4: Secure the Rope to the Line
Attach your fishing line to the hook’s eye using a reliable knot. The Palomar knot is a great choice for its strength and simplicity. If you’re unfamiliar with knot-tying, refer to resources like Take Me Fishing for tutorials. If you’re adding a weight, slide it onto the line before tying the hook to control the lure’s sink rate.
Step 5: Test and Adjust
Before heading to the water, test your lure’s durability. Tug on the frayed end to ensure the fibers hold up under pressure. If they pull apart too easily, trim the frayed section and re-fray a shorter length. Additionally, check that the hook and line connection is secure by pulling firmly. A well-made rope lure should feel sturdy yet flexible.
Tips for Using Your Rope Lure
Once your lure is ready, knowing how to use it effectively is key. Gar are often found in warm, slow-moving waters like rivers, lakes, and bayous. Here are some tips to maximize your success:
- Cast near cover: Gar often lurk near weeds, logs, or shallow banks. Cast your lure close to these areas and let it sink slightly before retrieving.
- Use a slow retrieve: A steady, slow retrieve allows the frayed rope to flutter, enticing gar to strike.
- Set the hook gently: Unlike traditional hooks, rope lures rely on entanglement. When you feel a bite, reel in steadily to let the fibers catch in the gar’s teeth.
- Check the lure after each catch: Gar teeth can wear down the rope. Inspect and re-fray as needed to maintain effectiveness.
Common Mistakes to Avoid
While making and using a rope lure is straightforward, beginners often make a few mistakes. First, avoid using cotton or natural-fiber ropes, as they degrade quickly in water. Instead, stick to synthetic materials like nylon. Second, don’t over-fray the rope, as this can weaken the lure. Finally, ensure your knots are tight and reinforced with glue to prevent slippage during a fight.
Maintenance and Storage
To keep your rope lure durable, rinse it with fresh water after each fishing trip to remove debris and fish slime. Store it in a dry, cool place to prevent mold or weakening of the fibers. If the frayed section becomes too worn, trim it back and re-fray it to extend the lure’s life. Regularly inspect the hook for rust and replace it if necessary.
Conclusion
Crafting a durable rope lure for catching gar is a rewarding project that combines creativity with practicality. By following the steps outlined above, you can create a lure that’s tough enough to handle the aggressive strikes of gar while being simple and affordable to make. With the right materials, proper knot-tying techniques, and a bit of patience, you’ll be well-equipped to land these toothy predators. So, grab your supplies, hit the water, and enjoy the thrill of gar fishing with your custom-made rope lure.
FAQs
Why is a rope lure better than a traditional hook for gar?
A rope lure’s frayed fibers entangle in a gar’s teeth, providing a secure hold that traditional hooks struggle to achieve due to the fish’s bony mouth.
What type of rope is best for making a gar lure?
Nylon rope with a 1/4- to 3/8-inch diameter is ideal. It’s strong, flexible, and frays well without breaking down quickly in water.
How do I know if my rope lure is durable enough?
Test the lure by tugging on the frayed end and checking the hook’s knot. If the fibers hold and the knot stays secure, it’s ready for use.
Can I reuse a rope lure after catching a gar?
Yes, rinse the lure, inspect for wear, and re-fray if needed. Replace the hook if it’s rusted or damaged to maintain effectiveness.
Where should I fish for gar with a rope lure?
Gar thrive in warm, slow-moving waters like rivers, lakes, and bayous. Cast near weeds, logs, or shallow banks for the best results.