

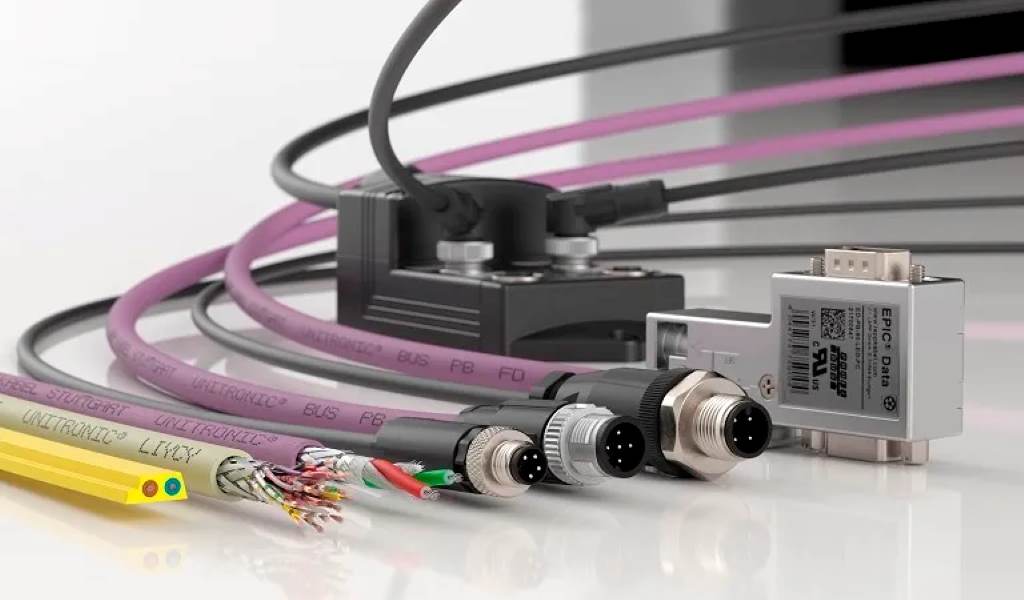
Terminating shielded twisted pair (STP) cable is a critical skill for anyone setting up a reliable network, whether for home or professional use. Unlike unshielded twisted pair (UTP) cables, STP cables have an additional layer of shielding to protect against electromagnetic interference, making them ideal for environments with high electrical noise. At Accure Home, we understand the importance of proper cable installation for optimal network performance. This guide provides a step-by-step approach to terminating STP cables, ensuring a secure and efficient connection for your networking needs.
Understanding STP Cable and Its Benefits
STP cables consist of twisted pairs of wires wrapped in a foil or braided shield, which reduces interference from external sources like power lines or radio signals. This makes them suitable for industrial settings, data centers, or homes with complex electrical systems. Properly terminating STP cables ensures the shielding remains effective, maintaining signal integrity. For related wiring tasks, such as coax cable wiring, similar attention to detail is required to achieve a clean and functional setup. By following precise termination techniques, you can avoid common issues like signal loss or network instability.
Tools and Materials Needed
Before starting, gather the necessary tools and materials to streamline the termination process. Having everything prepared saves time and reduces errors.
- STP cable: Ensure you have the correct category (e.g., Cat6 or Cat7) for your network requirements.
- RJ45 connectors: Use shielded connectors compatible with STP cables.
- Crimping tool: A high-quality tool designed for RJ45 connectors.
- Cable stripper: For removing the outer jacket without damaging the wires.
- Scissors or wire cutters: For trimming wires to the correct length.
- Cable tester: To verify the connection after termination.
- Grounding wire (optional): For environments requiring additional grounding.
Step-by-Step Guide to Terminating STP Cable
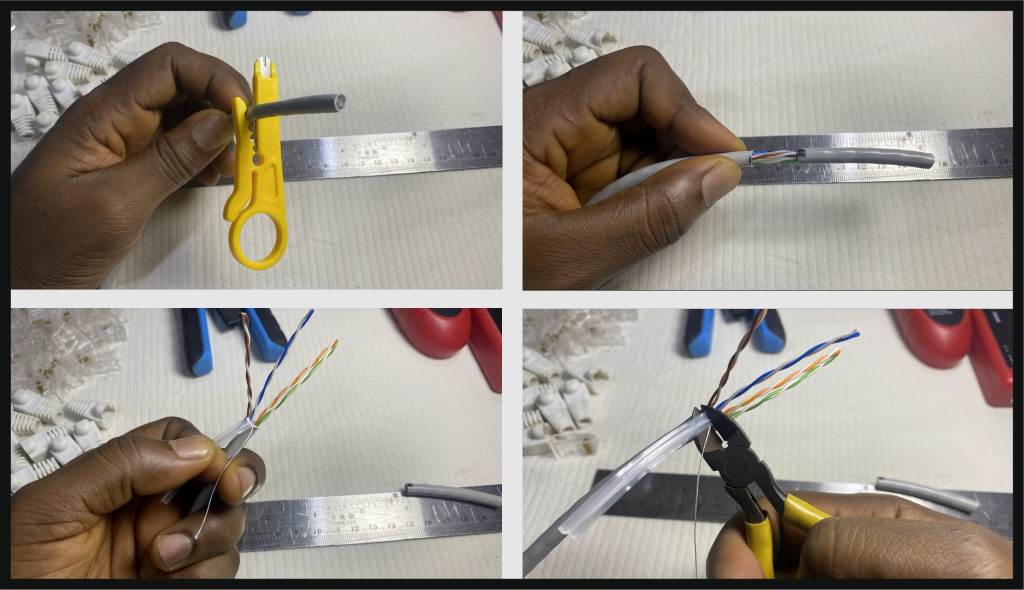
Terminating an STP cable requires precision to maintain its shielding and ensure a stable connection. Follow these steps for a professional result.
Step 1: Prepare the Cable
Start by measuring the required length of STP cable, leaving some extra length for flexibility. Use a cable stripper to carefully remove about 1.5 inches of the outer jacket. Be cautious not to nick the inner wires or the shielding. Once the jacket is removed, you’ll see the foil or braided shield surrounding the twisted pairs. Gently pull back the shield to expose the wires, ensuring it remains intact for grounding purposes.
Step 2: Untwist and Arrange the Wires
Carefully untwist the four pairs of wires. Arrange them according to the T568-B configuration, which is the most common standard for network cables. The T568-B order is:
- Orange-white
- Orange
- Green-white
- Blue
- Blue-white
- Green
- Brown-white
- Brown
Flatten and align the wires in this order, ensuring they are straight and untangled. Trim the wires to about 0.5 inches using scissors or wire cutters for a clean fit into the RJ45 connector.
Step 3: Insert Wires into the RJ45 Connector
Take a shielded RJ45 connector and insert the arranged wires into the connector, ensuring each wire reaches the end of the connector’s slots. The wires should align with the connector’s pins, following the T568-B order. Verify that the shield (foil or braid) is in contact with the metal casing of the connector, as this maintains the grounding and shielding properties.
Step 4: Crimp the Connector
Place the connector into the crimping tool, ensuring it is fully seated. Squeeze the tool firmly to secure the wires and the shield in place. The crimping tool will also fasten the connector’s strain relief to the cable’s outer jacket, providing additional stability. Inspect the crimped connector to ensure the wires are secure and the shield is properly connected.
Step 5: Ground the Shield (If Necessary)
In some environments, grounding the STP cable’s shield is essential to prevent interference. If your setup requires grounding, connect the exposed shield to a grounding wire or terminal. This step is particularly important in industrial settings or areas with significant electromagnetic interference. Consult local electrical codes or a professional if you’re unsure about grounding requirements.
Step 6: Test the Cable
Use a cable tester to verify the connection. Plug both ends of the terminated cable into the tester and check for continuity and correct wiring. The tester will indicate if the wires are in the correct order and if the shield is properly connected. If errors are detected, recheck the wire arrangement and recrimp as needed.
Read Also:
7 Essential Steps to Design a 3D Home Like a Pro
Oklahoma City Smart Home Upgrades
Common Mistakes to Avoid
Even experienced installers can make errors during STP cable termination. Here are some pitfalls to watch for:
- Damaging the shield: Cutting or tearing the foil or braided shield reduces its effectiveness. Handle it carefully during stripping.
- Incorrect wire order: Mixing up the T568-B or T568-A configuration can cause connectivity issues. Double-check the standard before crimping.
- Poor crimping: Insufficient pressure or incorrect tool settings can lead to loose connections. Use a quality crimping tool and inspect the result.
- Ignoring grounding: In high-interference environments, failing to ground the shield can degrade performance. Ensure proper grounding when required.
Tips for a Professional Installation
To achieve a reliable and long-lasting STP cable termination, consider these additional tips. First, always use high-quality tools and connectors to avoid issues like signal degradation. Second, label both ends of the cable to track connections in complex setups. Finally, test the cable in its actual environment to ensure it performs as expected. For more networking tips, resources like Fluke Networks offer valuable insights into cable testing and installation best practices.
Why Proper Termination Matters
Properly terminated STP cables ensure optimal network performance, especially in environments with high electromagnetic interference. Incorrect termination can lead to signal loss, slow data transfer, or complete network failure. By following the steps outlined above, you can create a robust network infrastructure that supports high-speed data transfer and minimizes disruptions. Additionally, understanding related skills, such as those covered in guides from Cable Matters, can enhance your overall wiring expertise.
FAQs
What is the difference between STP and UTP cables?
STP cables have a foil or braided shield to reduce electromagnetic interference, making them ideal for noisy environments. UTP cables lack this shielding, making them simpler but less resistant to interference.
Do I need special tools to terminate STP cables?
Yes, you need a cable stripper, crimping tool, and shielded RJ45 connectors. A cable tester is also recommended to verify the connection.
Can I use STP cables without grounding the shield?
While possible, grounding the shield is recommended in high-interference environments to maximize the cable’s performance and reduce signal noise.
What is the T568-B configuration?
The T568-B configuration is a standard for arranging twisted pair wires in an RJ45 connector, commonly used for network cables to ensure consistent wiring.
How do I know if my STP cable is terminated correctly?
Use a cable tester to check for continuity, correct wire order, and proper shield connection. Testing ensures the cable functions reliably.
Conclusion
Terminating shielded twisted pair (STP) cables is a straightforward process when you follow the right steps and use the proper tools. By carefully preparing the cable, arranging the wires, crimping the connector, and testing the connection, you can achieve a professional-grade network setup. Proper termination not only enhances network performance but also ensures durability and reliability. Whether you’re setting up a home network or a complex industrial system, mastering STP cable termination is a valuable skill that pays off in consistent connectivity.